Since I refuse to spend 40 something dollars on a Leman Russ, I decided to build my own. Since I don't have a lot of tank treads left I needed to make some copies of the ones that I do have!
This is what you'll need:
Plaster, water, (Optional PVA glue), non-hardening clay, old sprue frames
Plaster, water, and a bowl. I also add pva glue to the mixture, because I feel that it makes the plaster a bit less brittle.
Now get your clay and spread flatly along some surface; I used a ceramic tile.

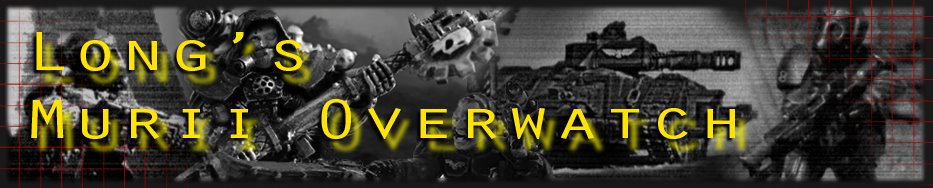
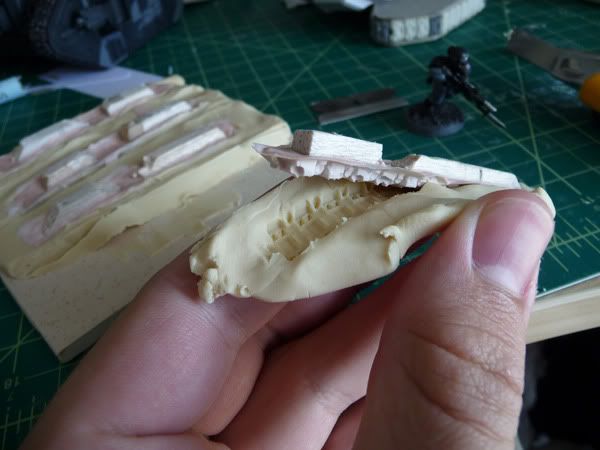
Now get your tank treads and press em in the clay
To do the least damage to the mold, get a small knife or pin and try to pop the plastic tread out of the clay by just pulling up from one end like so:

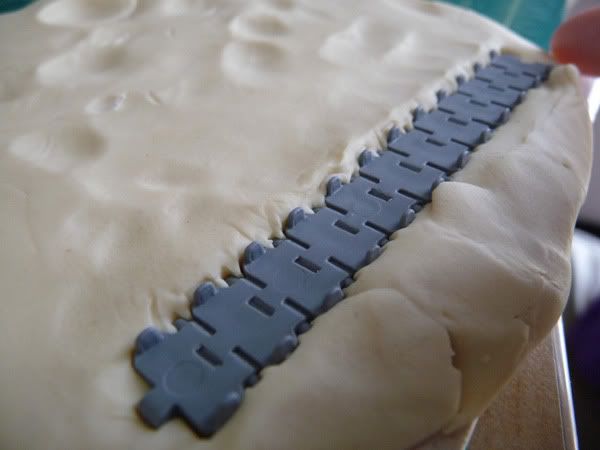
Now prepare the plaster. If you've never worked with it, be careful not to add too much water, its really easy to make your mixture too watery. You want your wet plaster to be the consistency of pudding. Pour the mixture into your mold.
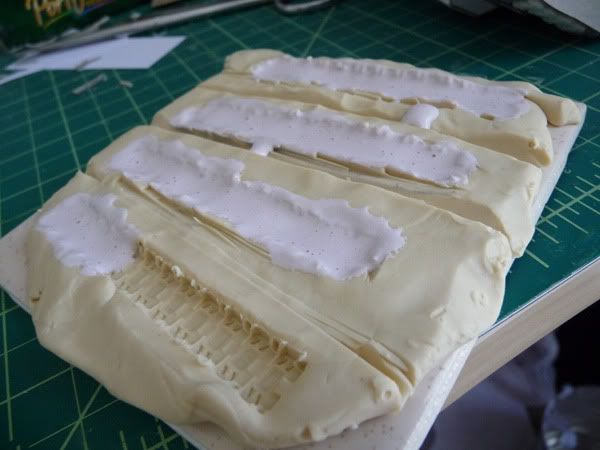
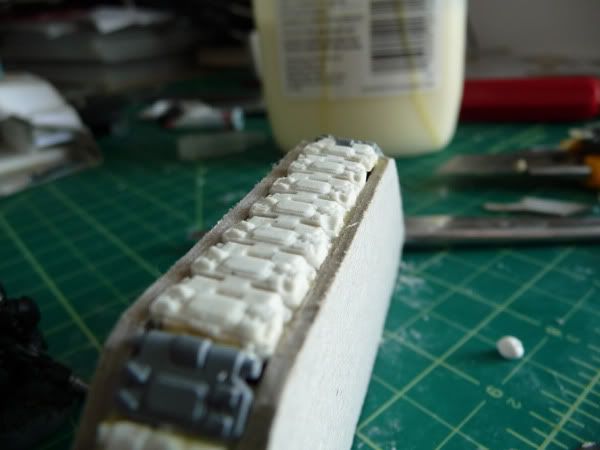
Since I am making treads, I needed to reinforce them with something because they are very thin and dry plaster is brittle like hell. I used balsa wood strips and set them into the plaster while it was still wet. A good idea would be to use an old sprue frame instead of balsa wood.
While the plaster is drying, shake the clay mold so that the air bubbles in the wet plaster rise to the top, this is important if you want a good looking mold. I forgot to do this, and had several air bubbles in my treads!
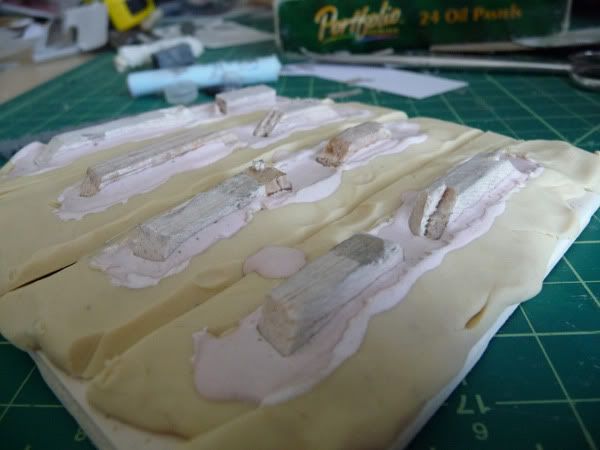
Let it dry for a few hours. When its ready, carefully pop out the plaster. Peel away at the edges of the clay mold, until you see that the dry plaster is starting to detach from the clay.

Cut off the edges where the plaster overflowed and glue the track sections onto your tank! In all honesty, while these plaster treads can look pretty good, they are only useful as long straight sections for your tank. For the curving treads, just use the extra plastic ones that came with your other tanks!

In case it isn't obvious, there are much better ways of doing this. But this method, is by far the cheapest, easiest, and quickest to do!


No comments:
Post a Comment